
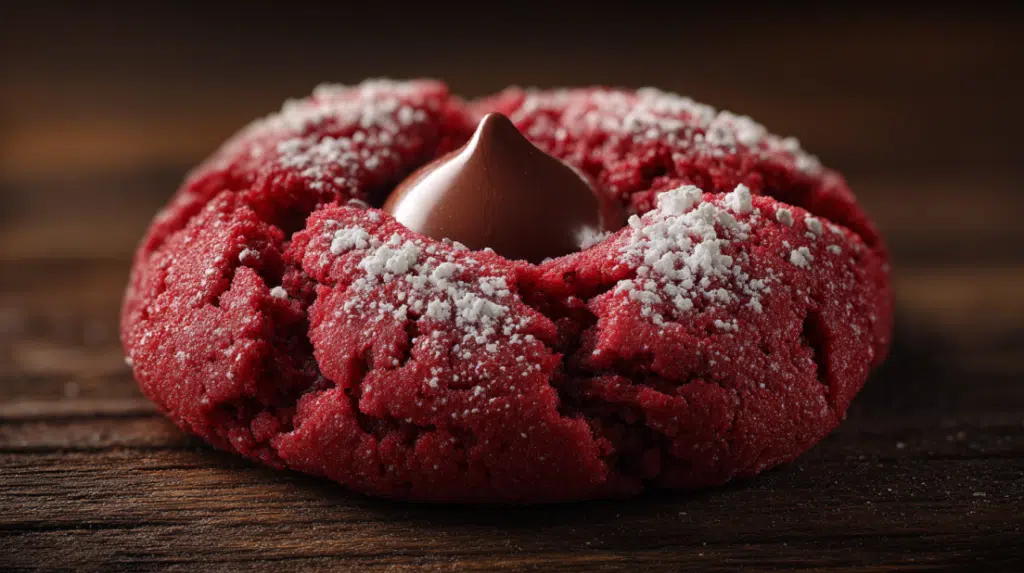
This Hershey’s Red Velvet Blossoms recipe comes together in about 30 minutes and is baked right on a sheet pan for a super quick and easy treat that your family will love! These sweet little cookies are not just visually stunning with their vibrant red color and chocolatey Hershey’s Kiss on top; they are also perfect for any occasion. Whether you’re sneaking in a sweet surprise after a busy weeknight dinner or preparing a batch for a special celebration, you’ll find tons of ways to customize them. Feel free to switch up the flavors or even the Kisses, perhaps try peppermint ones around the holidays or white chocolate for something different!
Ingredients Breakdown
What You’ll Need:
2 1/4 cups all-purpose flour : This forms the base of your delicious cookies. I love using all-purpose flour because it’s versatile and gives the right texture.
1 teaspoon baking soda : A must for helping our Blossoms rise just a little and create that soft, chewy texture we crave.
1/2 teaspoon salt : Just a couple pinches to really bring out the sweetness.
1 tablespoon cocoa powder : This adds a delectable chocolate flavor that pairs perfectly with the red velvet.
1 cup unsalted butter, softened : Make sure your butter is at room temperature, otherwise, you won’t get that fluffy goodness when you cream it with sugar.
1 1/2 cups granulated sugar : Because let’s face it, cookies need sugar!
1 large egg : The binding agent that helps everything come together.
1 tablespoon red food coloring : This gives those beautiful red velvet cookies their striking color. Feel free to adjust based on how red you want them.
1 teaspoon vanilla extract : A splash of vanilla for a hint of warmth and depth in flavor.
Hershey’s Kisses : The perfect little finishing touch! I’ve tried different types, and honestly, you can’t go wrong with the classic chocolate Kisses.
Let’s Get Cooking!
Step-by-Step Instructions
Preheat your oven to 350°F (175°C). There’s nothing quite like the anticipation of warm cookies baking away in the oven!
In a mixing bowl, whisk together 2 1/4 cups of flour, 1 teaspoon of baking soda, 1/2 teaspoon of salt, and 1 tablespoon of cocoa powder. This may seem tedious, but trust me this step ensures everything is evenly distributed.
In a separate bowl, cream together 1 cup of softened butter and 1 1/2 cups of granulated sugar until light and fluffy. This usually takes about 2-3 minutes. You want it to look pale and airy, almost like whipped cream!
Beat in 1 large egg, 1 tablespoon of red food coloring, and 1 teaspoon of vanilla extract. You’ll start to see that lovely red color develop as you mix.
Gradually add the dry ingredients to your wet mixture. Just mix until combined overmixing can lead to dense cookies, and nobody wants that! Stir until you no longer see any flour, making sure to scrape the sides as needed.
Roll the dough into balls (about 1-2 inches in diameter) and place them on a lined baking sheet. You’ll want a bit of space between them because they do spread a little!
Pop them in the preheated oven and bake for about 8-10 minutes. They should be set but not browned, so keep an eye on them! The smell will be incredible.
As soon as you take them out, gently press a Hershey’s Kiss into the center of each cookie. Wait, this is the best part. The Kisses will melt just a tiny bit, making them oh-so-delightful.
Allow the cookies to cool on the baking sheet for a few minutes before transferring them to a wire rack to cool completely. It’s hard, but try to resist eating them all while they’re still warm!
Why I Love This Recipe
Oh man, where do I even start? This is my go-to recipe when I need a quick treat that feels like comfort food but doesn’t take all day to whip up. I’m a real sucker for the beautiful red color and that gooey chocolate kiss on top! Honestly, my kids think it’s the best dessert ever, and seeing their happy little faces makes it all worth it. The best part is you can customize these cookies so easily! Adding nuts or even different types of chocolate is just a fun way to make it your own.
If you loved this recipe, be sure to check out my Raspberry Almond Snowball Cookies, my Cranberry Poke Cake, or my Christmas Pizzelle Cookies!
What Makes These Red Velvet Blossoms Special
Easy Peasy
These cookies come together in under 30 minutes yes, you read that right! Between the mixing, baking, and that glorious melting Kisses moment, your family will be devouring these in no time. It’s perfect for those busy weeknights or when you just need a sweet fix in a flash.
Minimal Cleanup
You’ll only need a couple of bowls and your baking sheet for this recipe, yay for easy clean-up! Just line your baking sheet with parchment paper, which also doubles as an easy transfer method for your cookies once they’re baked.
Customizable Fun
What I love about this recipe is how easily you can switch things up depending on what you’ve got on hand. Do you see some mini chocolate chips in your pantry? Toss them in! Or maybe you want to throw in some crushed nuts for something extra. The possibilities are endless!
Comfort Food Delivered
Red velvet cookies are all about the cozy vibes, experiment with the flavors you love! Plus, the rich cocoa and sweet vanilla make a combo that seriously comforts the soul. You’ll want to share these with everyone, trust me!
Kid-Friendly
My kids have declared these cookies a total win! They’re fun to make and even more fun to eat. Get the little ones involved in rolling the dough into balls or pressing the Kisses in the middle. It’s a great way to spend time together and create some sweet memories!
Serving and Storage Tips
How to Serve These Cookies
While these cookies are fantastic all on their own, I like to serve them with a tall glass of milk or even a scoop of ice cream! If you want to level it up, serve them warm straight from the oven for an extra cozy treat.
Storage Instructions
These cookies keep well in an airtight container for about a week, if they last that long! If you want to keep them fresher for longer, place them in the fridge, and they should last about 10 days.
Best Method to Reheat
Simply microwave them for about 10 seconds to bring back that melt-in-your-mouth goodness. Seriously, you won’t regret it!
Freezer Friendly
Yes! If you want to make a big batch, these cookies freeze beautifully. Just wrap them tightly in plastic wrap or store them in a freezer-safe container. They’ll last up to three months, and you can pull them out for a quick sweet treat anytime!
Final Thoughts
These Hershey’s Red Velvet Blossoms are definitely my go-to recipe for quick and easy cookies that my whole family adores. From the vibrant red color to the smooth chocolate surprise, they bring happiness and comfort to our home in every single bite. I just know you and yours will enjoy them as much as we do! Happy baking!
Feel free to print this out and pin it for later! If you try the recipe, let me know how it goes. I love hearing from you. Happy cooking, friends! For more Recipes Follow Us in our Pinterest.
Print
Hershey’s Red Velvet Blossoms
- Total Time: 25 minutes
- Yield: 24 servings 1x
- Diet: Vegetarian
Description
Quick and easy red velvet cookies topped with a Hershey’s Kiss, perfect for any occasion.
Ingredients
- 2 1/4 cups all-purpose flour
- 1 teaspoon baking soda
- 1/2 teaspoon salt
- 1 tablespoon cocoa powder
- 1 cup unsalted butter, softened
- 1 1/2 cups granulated sugar
- 1 large egg
- 1 tablespoon red food coloring
- 1 teaspoon vanilla extract
- Hershey’s Kisses
Instructions
- Preheat your oven to 350°F (175°C).
- In a mixing bowl, whisk together flour, baking soda, salt, and cocoa powder.
- In a separate bowl, cream together butter and sugar until light and fluffy.
- Beat in the egg, red food coloring, and vanilla extract.
- Gradually add the dry ingredients to the wet mixture until just combined.
- Roll the dough into balls and place them on a lined baking sheet.
- Bake for about 8-10 minutes until set but not browned.
- Press a Hershey’s Kiss into the center of each cookie immediately after baking.
- Let cool on the baking sheet for a few minutes before transferring to a wire rack.
Notes
These cookies are customizable—try adding chocolate chips or nuts for variation.
- Prep Time: 15 minutes
- Cook Time: 10 minutes
- Category: Dessert
- Method: Baking
- Cuisine: American
Nutrition
- Serving Size: 1 cookie
- Calories: 150
- Sugar: 10g
- Sodium: 100mg
- Fat: 8g
- Saturated Fat: 5g
- Unsaturated Fat: 3g
- Trans Fat: 0g
- Carbohydrates: 18g
- Fiber: 0g
- Protein: 1g
- Cholesterol: 30mg