This Keto Crunchwraps Recipe for Guilt-Free Indulgence comes together in about 30 minutes and is perfect for a easy weeknight dinner that your family will love! Switch up the filling ingredients to suit your taste or use it as a “clean out the fridge” meal to get rid of leftovers and odds and ends!
Ingredients Breakdown
To get started with these scrumptious Keto Crunchwraps, here’s what you’ll need:
2 tablespoons Butter : Unsalted is best for better control of seasoning. Melt it down and let the flavor take the lead!
4 ounces Cream Cheese : You can substitute this with dairy-free cream cheese if needed, it’s super adaptable!
1/4 cup Heavy Whipping Cream : If you’re looking for a dairy alternative, coconut cream works like a charm here.
1 cup Shredded Cheddar Cheese : Sharp cheddar gives it a more robust, punchy flavor. But hey, use whatever cheese makes your heart sing!
1 pound Ground Beef : Ground chicken or turkey are great substitutes if you’re craving something lighter.
2 tablespoons Taco Seasoning : You can use homemade or low-sodium versions to keep it health-conscious.
4 pieces Low-Carb Tortillas : Brands like Mission Carb Balance or almond flour tortillas work perfectly for this recipe!
1 cup Sour Cream : Greek yogurt can substitute this for a lighter version if you’re counting those macros.
1 cup Lettuce : Shredded iceberg or romaine adds that crunchy freshness to your wrap.
1 medium Tomato : Swap it out with bell peppers, or omit altogether if you’re cutting carbs!
1 cup Extra Cheddar Cheese : Consider adding pepper jack for a spicy kick if you’re feeling adventurous!
1/4 cup Cilantro : A fresh herb that can be substituted with parsley if cilantro isn’t your jam.
1/2 cup Jalapeño Slices : Optional, but if you love heat, go for it!
1 tablespoon Olive Oil : Any cooking oil will work fine, just keep it healthy!
How to Make Delicious Keto Crunchwraps
Step 1: Cheese Sauce Preparation
In a medium saucepan, melt butter over medium heat. As you swirl it around, let the aroma fill the kitchen, trust me, it’s heavenly! Add in the cream cheese and a splash of heavy whipping cream, stirring until the mixture is smooth and creamy. It takes about 3-4 minutes. You want this cheese sauce to be luscious, so keep stirring until it’s all melted together, oh, and don’t forget a couple pinches of salt and pepper.
Step 2: Beef Cooking
Next, in a skillet, heat your olive oil over medium-high heat. Add the ground beef to the pan and cook until browned and cooked through, which should take about 5-7 minutes. Break it up with your spatula, getting in those cracks and bubbles. Make sure to scrape the yummy bits off the bottom of the pan for more flavor! Add taco seasoning and stir everything together, bring to a simmer, then reduce heat and cook until fragrant, around 2 minutes.
Step 3: Tortillas Crisping
Now, here comes the fun part! Grab a separate skillet and set it on low heat. Lay down one low-carb tortilla, just for a minute, to warm it up. This helps in making it more pliable for assembling. Feeling fancy? You can lightly toast it on both sides if you want a little extra crunch. Repeat this step for all the tortillas, you’ll thank me for it later!
Step 4: Crunchwrap Assembly
Grab your warm tortilla and spread a good dollop of cheese sauce in the center (yes, I mean a good dollop!). Add a scoop of your seasoned beef, followed by lettuce, tomato, and a bit of sour cream. Sprinkle some extra cheddar cheese on top, and if you’re feeling spicy, toss in some jalapeños. This is where you can really customize to your heart’s content!
Now here’s the trick: fold the edges of the tortilla towards the center, overlapping them as you go around to enclose all the goodness inside. You want a nice wrapped little package, so press it down to keep it together!
Step 5: Crunchwrap Cooking
Heat a non-stick skillet to medium-high and add a little oil to it. Place your assembled crunchwrap, seam side down, onto the skillet. Let it cook until it’s crispy and golden brown, about 3-4 minutes. Flip it carefully and repeat on the other side, this is when it gets that perfect golden crust!
Step 6: Serving
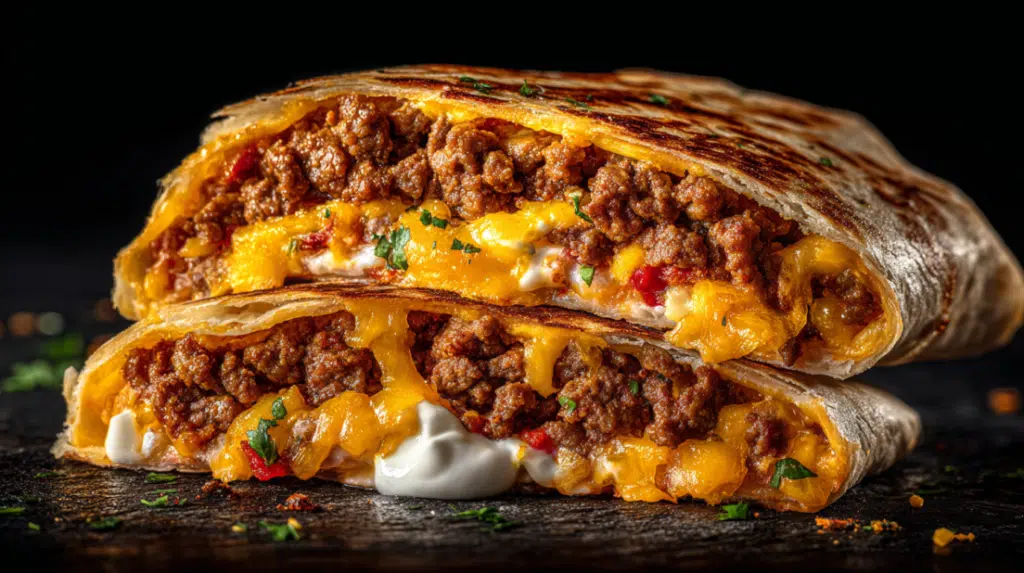
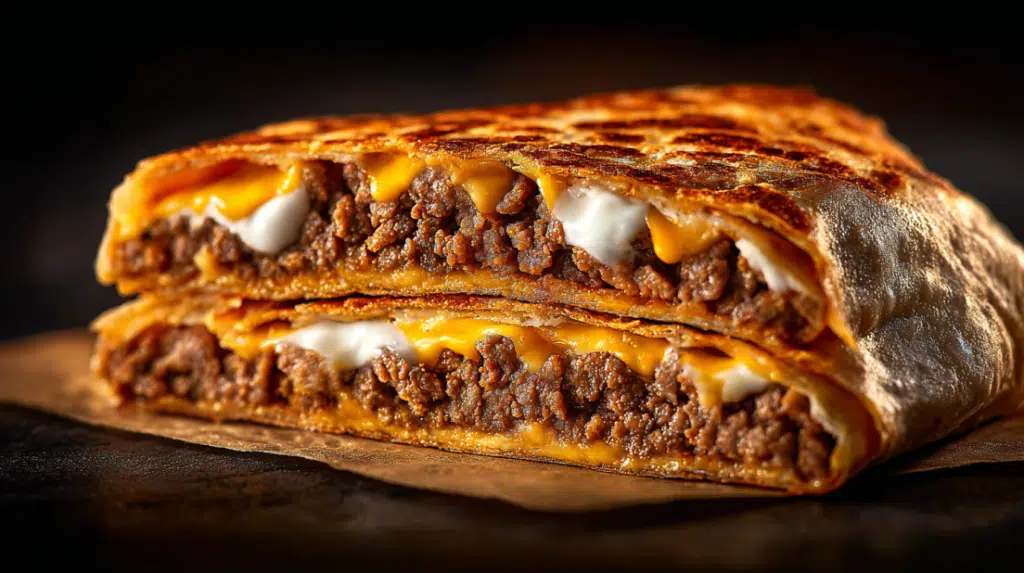
Slice it in half and behold the beauty inside! You can serve these crunchy delights with a side of extra sour cream, or maybe some fresh salsa. Trust me, your family will love it!
Why I Love This Recipe
This is my go-to recipe when I simply want something comforting that isn’t going to derail my week. I’m a real sucker for anything crispy and cheesy, and the best part is, you can totally customize these crunchwraps with whatever you’ve got on hand! Whenever I make them, I can’t help but feel that cozy vibe come rushing in, especially when my kids ask for seconds. This dish has definitely become a family favorite in our house!
If you loved this Keto Crunchwraps recipe, be sure to check out my Broccoli Chicken Casserole, my High Protein Egg Roll In A Bowl, or my Pepperoni Pizza Rolls!
Why This Recipe Works
Customizable
The secret to these delicious Keto Crunchwraps is their flexibility! You can toss in whatever filling you have on hand. Got leftover chicken? Use that! Craving veggies? Load ‘em up!
Quick & Easy
In about 30 minutes, from sautéing to crunching, this dish comes together perfectly, making it ideal for bustling weeknights when you need to whip something up fast!
Comfort Food
Loaded with tons of flavor, crispy goodness on the outside, and creamy deliciousness inside, this is total comfort food that warms your soul! When you take that first bite, it’s hard not to smile.
Budget-Friendly
This recipe utilizes everyday ingredients that won’t break the bank, so cook away without worrying about the grocery bill.
Meal Prep-Friendly
Make a batch ahead of time, and store them in the fridge! They hold up well, thus making those busy weeks a whole lot smoother.
Serving and Storage Tips
How to Serve This Crunchwrap
Pair your crunchwraps with some guacamole, fresh salsa, or a crunchy side salad for added nutrients. They make a perfectly satisfying meal or snack!
Storage
These delicious wraps will keep in the refrigerator for about 3-4 days. Just be sure to store them in an airtight container to maintain freshness.
Reheating Instructions
Reheat them in a skillet over low heat to keep that delightful crunch. If you prefer the microwave, just pop it in for 30-60 seconds, but keep in mind you might lose some of that crispy texture.
Freezer Friendly
Yes, you can freeze them! Wrap each crunchwrap individually in plastic wrap and foil, then toss them into a freezer bag. They can last up to 3 months. Reheat in the oven or skillet for the ultimate crispy experience!
Food is really about bringing people together, you know? This recipe isn’t just a meal; it’s a reason to gather around the table, share stories, and enjoy each other’s company. Hope you enjoy these Keto Crunchwraps as much as my family does. Happy cooking, friends! For more Recipes Follow Us in our Pinterest.
Print
Delicious Keto Crunchwraps
- Total Time: 30 minutes
- Yield: 4 servings 1x
- Diet: Keto
Description
A delicious and customizable keto-friendly crunchwrap recipe that comes together in about 30 minutes, perfect for a quick weeknight dinner.
Ingredients
- 2 tablespoons Butter
- 4 ounces Cream Cheese
- 1/4 cup Heavy Whipping Cream
- 1 cup Shredded Cheddar Cheese
- 1 pound Ground Beef
- 2 tablespoons Taco Seasoning
- 4 pieces Low-Carb Tortillas
- 1 cup Sour Cream
- 1 cup Lettuce
- 1 medium Tomato
- 1 cup Extra Cheddar Cheese
- 1/4 cup Cilantro
- 1/2 cup Jalapeño Slices (optional)
- 1 tablespoon Olive Oil
Instructions
- In a medium saucepan, melt butter over medium heat, then add cream cheese and heavy whipping cream, stirring until smooth and creamy.
- In a skillet, heat olive oil over medium-high heat and cook ground beef until browned. Add taco seasoning and simmer for 2 minutes.
- Warm low-carb tortillas in a separate skillet over low heat for pliability.
- Assemble the crunchwrap by spreading cheese sauce on a tortilla, adding seasoned beef, lettuce, tomato, sour cream, and cheese. Fold tortilla edges to enclose filling.
- Cook the assembled crunchwrap in a non-stick skillet until crispy and golden brown, flipping halfway.
- Slice in half and serve with extra sour cream or salsa.
Notes
Customize your crunchwrap with any fillings you have on hand. Great for leftovers!
- Prep Time: 10 minutes
- Cook Time: 20 minutes
- Category: Main Course
- Method: Pan-frying
- Cuisine: American
Nutrition
- Serving Size: 1 crunchwrap
- Calories: 450
- Sugar: 3g
- Sodium: 600mg
- Fat: 30g
- Saturated Fat: 15g
- Unsaturated Fat: 10g
- Trans Fat: 0g
- Carbohydrates: 12g
- Fiber: 4g
- Protein: 28g
- Cholesterol: 70mg